As a developer, a generally held principle is that you should be careful about mixing personal and professional facets of your life. Care needs to be taken in order to make sure things like intellectual property are protected on both sides. A lot of the time we can achieve that sort of care by making sure our professional lives are completely separate from our personal lives in terms of things like the projects we work on, the time we allocate, and even the hardware used. When it comes to GitHub, Some companies and enterprises might require the use of separate accounts. Make sure to double-check any existing policies. That being said, the generally recommended practice is actually not to use multiple accounts. It is the recommended practice to use a single GitHub account for all purposes.
Using a single account for personal and professional purposes can make life a lot easier. It can provide a unified means to contribute to many different projects without having to switch accounts or manage multiple sets of credentials both in the browser and on the command line. Not to mention that using a single account means more green boxes! GitHub provides different ways to make the most of your account for all purposes. Armed with a little bit of information, you can make sure all your contributions to projects are recognized in the ways that you (and the organizations you contribute to) would like.
Organizations
One of the most important things you can do for yourself or your company is to make sure you're leveraging GitHub Organizations. Organizations provide a boundary that facilitates collaboration while controlling access and security across many different repositories. Security and access permissions can be granted via roles under the organization.
Creating a new organization is straightforward. On the Your Organizations page there is a button for New Organization. You will need to pick a plan. Free plans are available. Choosing a paid plan will get you things like more automation minutes and extra features like pages, wikis, and insights for private repositories. For open source repositories most features are already available on the free plan. Billing is per user in the organization. From there you will need to enter a little bit of information such as organization name and contact email. Once that form is completed you will be the proud owner of a brand new organization!
Organization Visibility
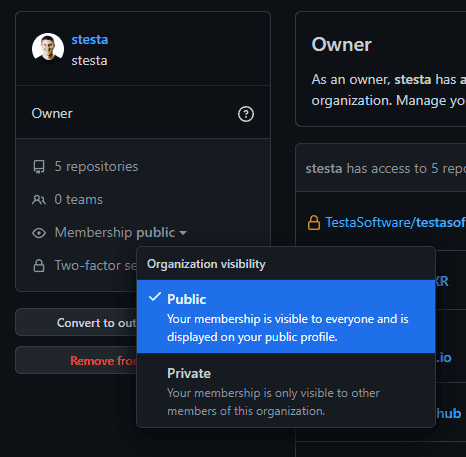
As an individual, we can choose how we want to publicize the organizations we belong to. Navigate to the People tab of your organization, find your user (you can search for yourself if necessary), and click on your user. The page you land on will have an option regarding membership visibility. You may select public or private. Public makes your membership in this group visible to everyone and the organization will be displayed on your public profile. Private will mean that your membership is only visible to other members of the organization.
Setting Your Email Address
You have probably already set up your global username and email address in git, but did you know you can set an email on an individual repository as well? Omitting the --global flag on the command saves the username and email local to the repository.
git config user.name "Steve Testa"
git config user.email "steve@testasoftware.com"
Setting an email on a specific repository will only affect your copy of the repository. After an email has been set then next time a git commit is issued it will use the more specific repository email over your globally set information.
Another trick to make sure your contributions are recognized is to add additional emails to your profile in GitHub. Any additional emails you add will need to be confirmed, but once that is done all commits with that email will be recognized as one of your contributions. Adding an email to your profile can be done via GitHub Settings and choosing the Email tab in the left-hand navigation. On that page, an "Add email address" input can be found.
It is a good idea to keep your personal email address as your primary email. Any work or other emails associated with contributions can be added as secondary email addresses. Additional preferences can be specified including the decision to receive notifications only on the primary email address.
SSH Keys
Another nicety of using a single GitHub account is that you can use and manage multiple SSH and GPG keys. Multiple keys can always be generated, added, and removed if you no longer need them.
While https is a perfectly secure option SSH keys can provide some extra comfort due to their larger key length and the private key being a piece of information that does not get shuffled around over the wire.
To create a new SSH key you can use the following command. This command will generate your SSH key using the Ed25519 algorithm. It was introduced in OpenSSH 6.5 and is compatible with GitHub. Ed25519 is a preferred algorithm, but RSA can also be used assuming the key size is least 4096-bit length. Compared to Ed25519, RSA is slower and can be unsafe if the key is smaller than 2048-bit length. Additionally, Ed25519 has the added benefit of being extremely compact weighing in at only 68 characters.
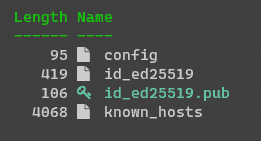
ssh-keygen -t ed25519 -C "your_email@example.com"After you run the command you will be prompted to enter both the location (it is recommended to just use the default directory) to save key and an optional passphrase. What will actually be generated is an SSH key pair. Included in that pair is both a public key and private key. A public key can be shared freely and will not compromise your security or identity. A private key, however, needs to be kept secret. The optional passphrase mentioned earlier is an extra bit of encryption around the private key keeping it that much safer. The public key can be identified by the .pub extension.
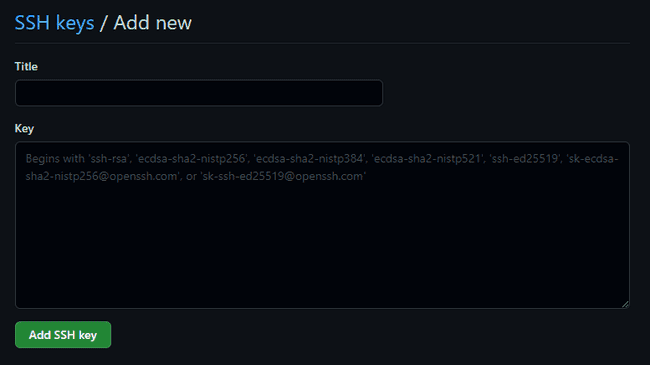
GitHub needs to know about your SSH key. To add your public key to GitHub go to your GitHub Settings and then SSH and GPG Key tab. You will find an button for "New Key". Enter a title so you can easily recognize the key that was generated and the Key will be the contents of your public key file.
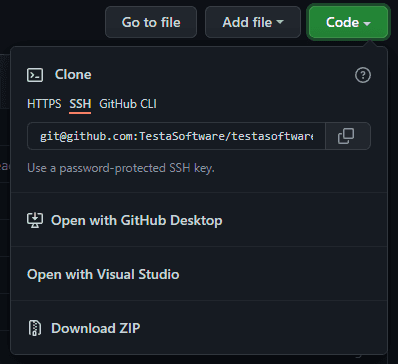
You can now clone a repo use the SSH link (or update your remotes on existing repositories). You can grab the SSH specific repository link via the clone dialog on GitHub. Git will recognize the default SSH directory and will automatically use your created SSH key to secure the communication.
Personal Access Tokens
A personal access token (PAT) is basically a password. PATs can be used either in the GitHub command line or against the API and provide authentication into secured resources. Token are easy to create. Additionally, they can be assigned specific permissions and given an expiration date for security purposes. Personal Access Tokens are the preferred way to handle authentication.
GitHub Token
There is a special access token named the GITHUB_TOKEN. When a workflow kicks off, GitHub will automatically create this token. The GITHUB_TOKEN can be used as a means of authentication inside of the workflow. The permissions specific to the repository that contains the workflow, but this can be a useful and convenient alternative to creating PATs specifically for one workflow. See Automatic token authentication for more details.
Leveraging Bot Accounts
Part of the catch when using a personal access token is that permissions are defined by desired functionality and are not repository specific. Meaning, a personal access token that is granted read/write permissions would apply to all repositories and resources the owner of that token can access. This can present some problems when we're working with resources that aren't owned personally.
A bot account can be a useful compromise and is a legitimate use-case in the GitHub Terms of Service. GitHub defines a bot account (which they refer to as a "machine account") like this in their terms:
A machine account is an Account set up by an individual human who accepts the Terms on behalf of the Account, provides a valid email address, and is responsible for its actions. A machine account is used exclusively for performing automated tasks. Multiple users may direct the actions of a machine account, but the owner of the Account is ultimately responsible for the machine's actions. You may maintain no more than one free machine account in addition to your free User Account.
A bot account can be created which has access to the desired resources. A PAT can be created on that bot account and used like normal. This ensures that any shared code (such as a GitHub action) cannot be used in a harmful way against unintended resources.
Notifications
The first step is to make sure all email addresses you wish to use are properly set up in the Settings -> Emails tab. (This was also mentioned above in the "Setting Your Email" section). It is best practice to keep your personal email address as the primary email. Any work or organization emails should be set as secondary.
As you start to belong to more organizations, managing your notifications will be important to your sanity. Notification preferences can be found in the Settings -> Notifications tab. There are delivery options for the various notification types. For example, if notifications are starting to flood your inbox you can uncheck "Email" in the "Watching" section and instead decide to only receive those notifications on "Web and Mobile".
Also, don't miss Custom Routing all the way at the bottom of the notifications screen. This setting allows you to send notifications, on a per organization basis, to a specific verified email address.
Leaving a Company
When leaving a company there are a few important steps to take with your GitHub account.
- Update your primary email
If it isn't already, make sure that your primary email is your personal email address. If you need to switch, also check that email address is verified. - Un-verify your company email address
You can delete your company email address and then re-add it (without verifying). This allows you to keep any commits associated with that email address linked and maintains credit for any contributions made. - Update your GitHub username
If your user name references your old company/organization, you should change your username. - Transfer organization ownership
If you are the sole owner of an organization that is no longer your responsibility, you should transfer ownership of that organization. - Remove yourself from organizations
When there are multiple owners or you are just an organization member, you can simply remove yourself from the organization. As a company with a separated employee, organization owners can also remove any members no longer associated with the organization.
Reference: the main outline for this post was taken from this forum post: lecoursen in GitHub Community


